RRPT has just returned from a wonderful photo tour of the Great Smoky Mountains. We had a great group of folks who were game for early mornings, long days, and late evenings! This was my 3rd trip to this area and by far, it was the best. We were gifted with some of the best weather conditions I have ever seen in this area.
During our trip, we discussed a lot about image processing, from which software products we use to which techniques we use to create our final images. So I decided to create some tutorials to demonstrate my approach… starting with my thought process and approach to my images, through the use of Camera Raw to enhance images and Photoshop layers and masks to modify specific areas of the images, to final touches!
These tutorials are chock full of tips and tricks on how to navigate and use Camera Raw and Photoshop. I focused on these products because I wanted to demonstrate that you can achieve beautiful images through basic tools, as not everyone has Photoshop plugins (NIK, TopazLabs, onOne, etc). So for these tutorials, I used what I consider to be the basic software tools need. For full disclosure, I work in Adobe’s Creative Cloud suite (Photoshop CC) and use and describe Photoshop’s version of Camera Raw, but if you have older versions of Photoshop or Photoshop Elements, you should be able to use processes described in these tutorials to enhance your images!
These tutorials are somewhat sequential… starting with Columbine, then Rivers, then Foggy Tree. I mentioned this, because Columbine is the longest tutorial and includes a significant amount of Camera Raw explanation. The other two tutorials, although still descriptive, are not as in-depth on Camera Raw functionality, but get straight to the enhancements. Although the tutorials demonstrate the use of Camera Raw and Photoshop on specific subjects, all of the techniques demonstrated can be used to enhance any image, any subject.
My goal was to create instructional videos that help photographers learn how to use the image processing tools available to them. Hope you enjoy! If you find these tutorials helpful, please subscribe to RRPT’s YouTube Channel, as we add videos and tutorials regularly!
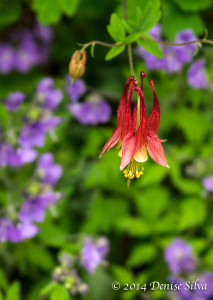
Columbine (Aquilegia canadensis):
In this tutorial, I show you the various features of Camera Raw and describe how I use the Basic adjustments, as well as the Adjustment Brush, features. Then I demonstrate how to bring the image back into Photoshop to enhance the blur/soft background (2 techniques for this!) and how to sharpen our main subject. I describe how to use layers and masks to selectively apply our adjustments, including what white/black masks do, and some tips and tricks for manipulating masks. I also describe how to select the brush tool and how to change its characteristics, including size and opacity. Lastly, this tutorial also describes Free Transform and how to use the transform tools, along with layers and masks to clone parts of your image.
To view this tutorial, click here.
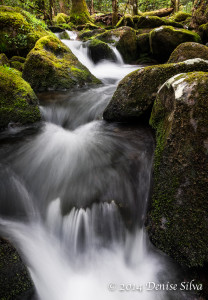
River:

In this tutorial, I demonstrate how to enhance a forest river scene. We cover how to clone unnecessary features from your image, add dimension to long-exposure water, straighten the image through the crop tool, and how to enhance the mossy rocks to give the image that added pop! These tutorial focuses primarily on the Adjustment Brush tool in Camera Raw and shows that you can take an image to nearly its final stage with this one invaluable piece of software.
To view this tutorial, click here.
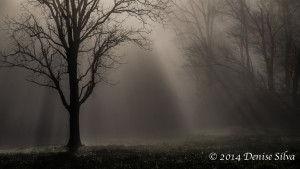
Foggy Tree:
 In the final tutorial in the set, I discuss how to enhance an image taken in deep fog. Most of us LOVE foggy days and foggy scenes, but can be stumped when we get home and see this flat monochromatic image. Where do we start? Well, this tutorial demonstrates that in a few easy steps, you can take a bright, flat, foggy scene and create a moody scene with dimension fit for a zombie movie!
To view this tutorial, click here.
![]()


