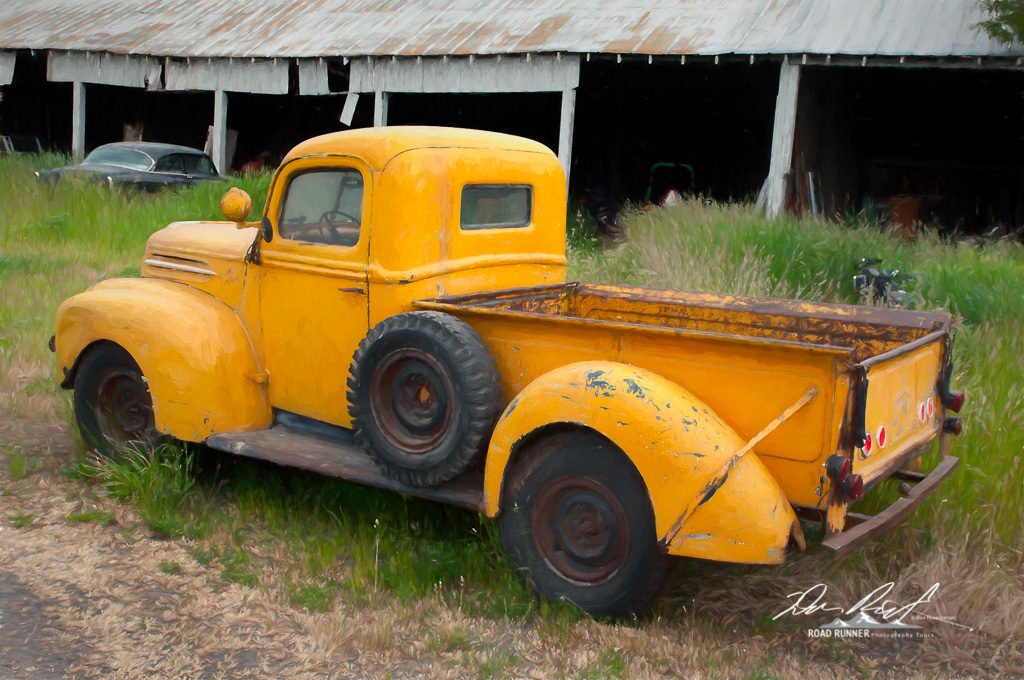
Recently I was searching my Lightroom Catalog for some images from Palouse. While the image featured in this blog was not the one I was looking for, it is the one that I decided to work on.
When I’m in the field sometimes I will take an image that I know exactly how I want to process, but not always. Sometimes it’s just about the composition. That was the case with this image.
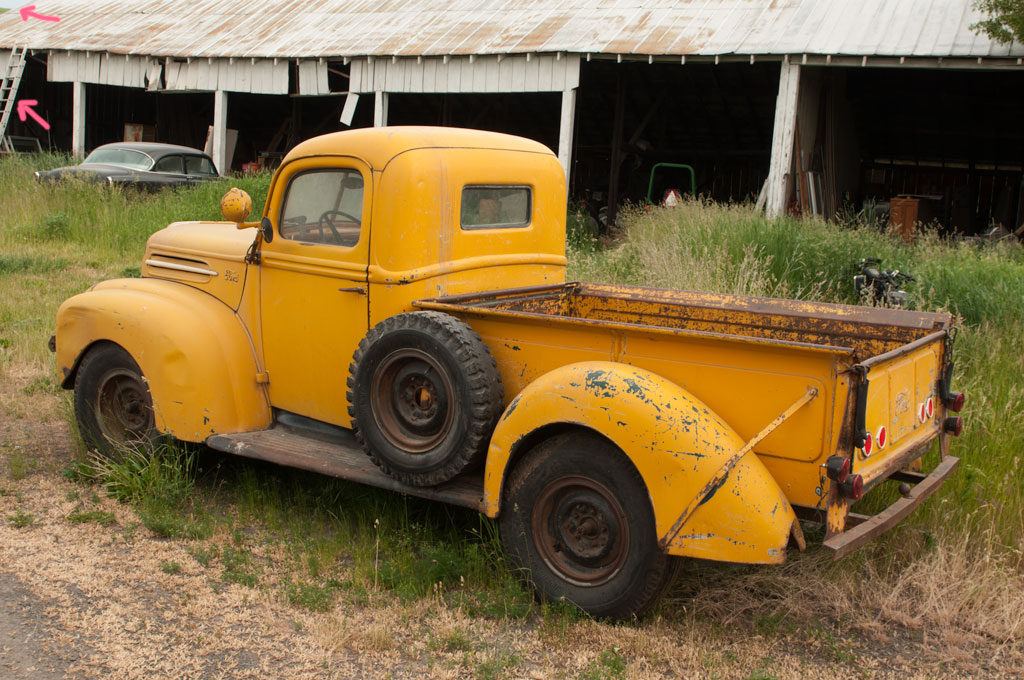
I think the composition is fine for the most part. Although I wish there was a little more detail inside the barn on the right side, I don’t think this is a deal breaker either. At the bottom of this post is the original unprocessed image for reference.
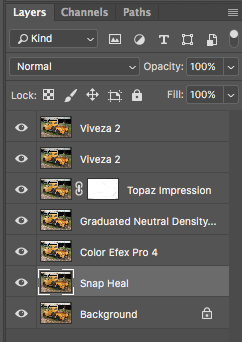
 Here is my layers palette from the finished image. I use layers in photoshop so I’m always working in a non destructive workflow. What this mean is I can always step back or start over without adversely affecting the original image. Since I’m starting from Lightroom you could argue that I always have the original raw file so no harm would come from working in a more destructive manner. While this is true, it would also mean that I need to go all the way back to the beginning. Another option is to use the history palette in photoshop for stepping backward. Then there is also smart objects, but I’m getting off topic. The wonderful thing about powerful programs like Photoshop is there are often multiple ways to reach the same destination.
Back to the original image (see bottom of page). I found the ladder and the tiny triangle of sky to be distracting. I first tried to remove the ladder with content aware fill in Photoshop. I was not happy with the result so I then tried Snap Heal from MacPhun and it did a perfect job of removing the ladder. The triangle was easily removed at the same time. Some might think the tree overhanging the roof on the left side of the frame is a problem. I don’t in this case because the tree leaves are contained within the roof so the roof line is unbroken, also the direction of the truck moves your eye to the left and toward the car in the background.
Next up I used Nik Color Effects Pro Contrast Filter and the Foliage filter to enhance the green grass behind the truck. The top of the image was brighter due to the reflective nature of the roof so I used a graduated neutral density filter to tone down the roof so your eye would not be drawn up away from the truck.
At this point I still found the image to be a little uninteresting so I decided to try a painterly effect using Topaz Impression. Upon opening in Impression, I liked the initial look and hit ok and moved the image back to PS. I applied a black mask and at first intended to paint in the background at 100% opacity and the truck at 50% or something less. After doing this and not liking the result I finished painting the truck and the result was 100% painterly effect from Topaz Impression.
I’m not a big fan of applying a Vignette to my images. The reason is most of the work I see online, this technique is heavy handed and obvious. I want to direct your eye without being obvious. I used Viveza to apply control points to darken the foreground and background without being obvious about my intentions.
If you want to try adding a painterly look to your images I recommend either Topaz Impression or Alien Skin Snap Art. Links and some discount codes are available on our website.

![]()


